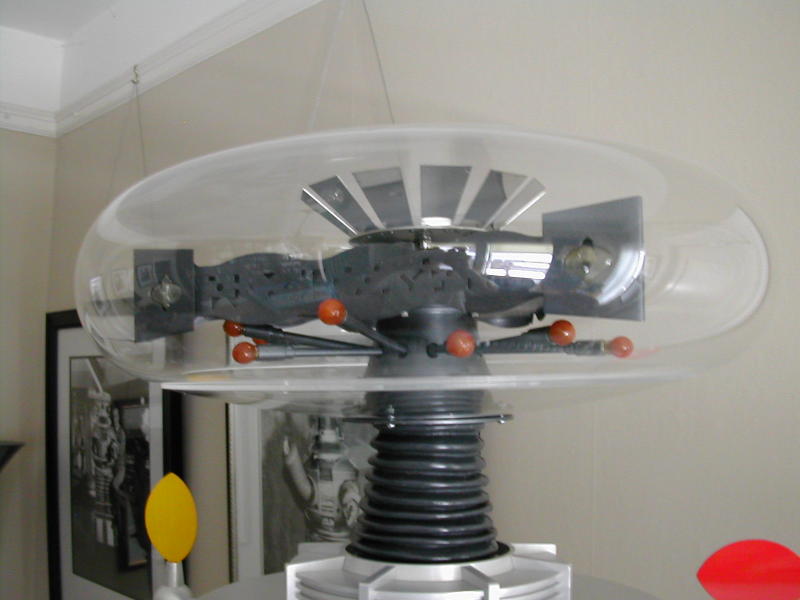
[I am indeed building a first-season robot. The red bulbs that I installed in the light rods are only temporary. I will replace these as soon as I get some clear bulbs.]
| Home | Back to June 2003 Progress | Previous Page | Next Page |
BRAIN
[I am indeed
building a first-season robot. The red bulbs that I installed in the light
rods are only temporary. I will replace these as soon as I get some clear
bulbs.]
My beautiful steel Scott Sanderson
brain was painted many months ago and remained unfinished until I decided
to act upon excellent advice given to me by Craig Reinbrecht. Both Craig
and Mike Joyce had collaborated on a way of decreasing the noise of the
hankscraft motor used to spin the crown and extend its life. This involved
eliminating all friction and pressure on the motor. In previous designs
for the brain assemly, the entire weight of the crown rests on the shaft
of the motor. This led to early demise of the motor and a great deal of
noise.
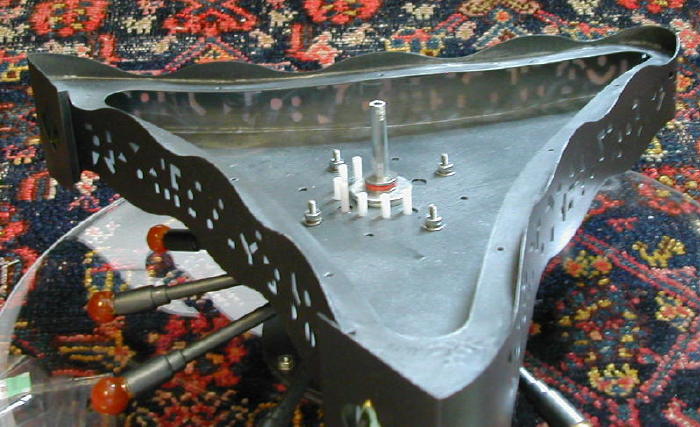
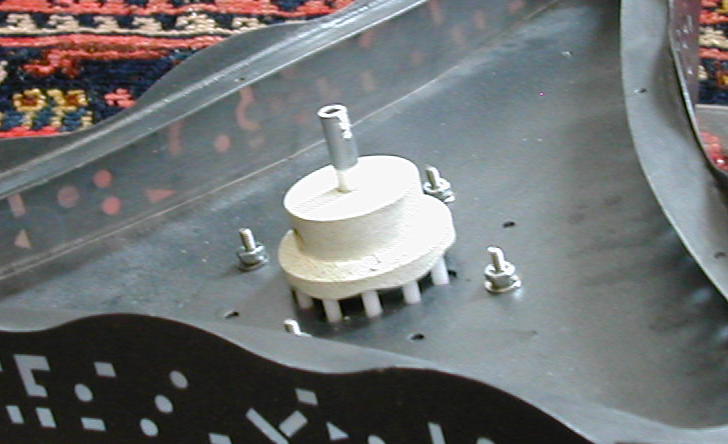
The key to reducing friction, Craig explained to me, was to install bearings in strategic places in the brain. The second component of this method is to attach the drive shaft extension to the shaft of the motor in a way that prevents the motor from any contact with the drive shaft. In the photo above you can see the thrust bearing in the top plate of the brain. The drive shaft runs through this bearing, which prevents wobble.
I also elevated the thrust bearing
inside the brain using a couple of steel washers. I did this so that I
could better see the light rods as they engaged with the brain cam.
The weight of the crown flows down
the drive shaft and is arrested by the brain cam, which is secured to the
shaft with a set screw. The weight is then transfered through the brain
cam to the thrust bearing and down to the bottom plate of the brain. This
method eliminates all weight below the brain, enabling the drive shaft
to be practically weightless immediately above the motor.
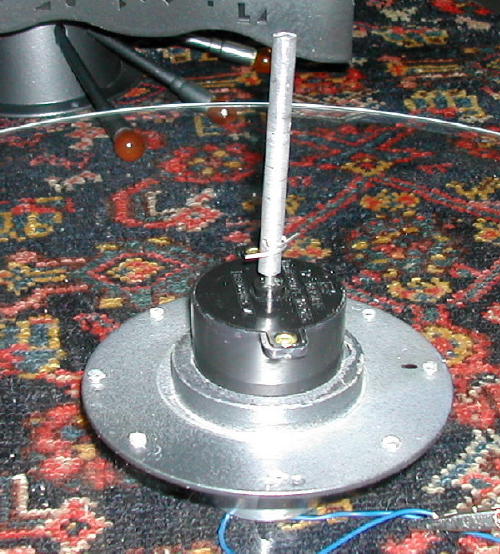
Additionally, the drive shaft is
only loosely connected to the motor. I drilled a hole through the shaft
of the motor and a corresponding hole through the aluminum tube that I
am using for the drive shaft. With the holes lined up, a thin length of
wire is inserted and wrapped around the shaft.
It is a beautiful and simple system.
Thanks to Craig Reinbrecht and Mike Joyce for inventing it!
| Miniature Precision SS Ball Bearing - ABEC-5 Flanged Shielded, .25" ID, .375" OD, .125" Width | McMaster Carr Part Number 57155K153 | $ 9.05 Each | |
| Economy Ball Thrust Bearing Stainless Steel, For 1/4" Shaft Diameter, 9/16" OD | McMaster Carr Part Number 6655K33 | $ 2.20 Each | |
| Drive shaft:
K & S. Engineering Chicago, IL.
1/4 x 035 Round Aluminum (6061-T6) Stock No. 3031 |
Ace Hardware | $1.89 for a 12-inch tube | |
| Hankscraft motor | bought second hand |