This programming unit came from the workshops and fertile mind of expert
robot builder Craig Reinbrecht. I simply followed his directions to complete
this wonderful kit.
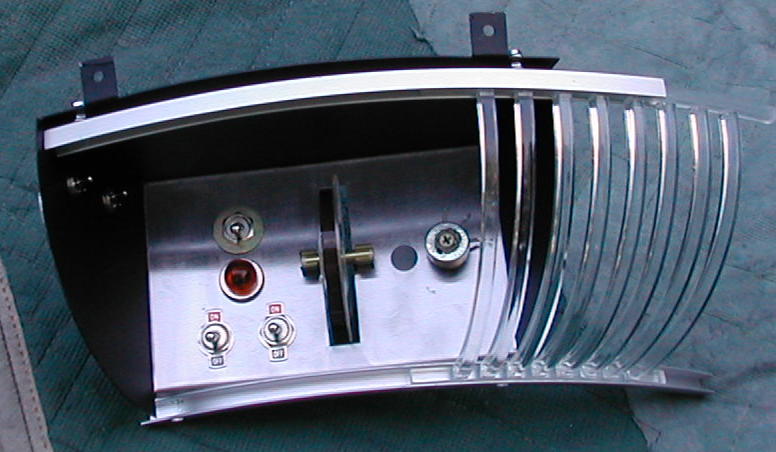
As for the paint, the sides and roof are painted with Dupli-Color Auto Spray: Univ. Flat Black: DS104, C2272. I had originally painted the face of the programming panel with the same nice Dupli-Color Arctic Silver paint as the microphone. In order to paint the face silver after spraying the sides black, I had to mask off the black area. Unfortunately, I ran into lots of problems. The paint would bleed through the masking tape. I masked off the silver area and resprayed the black areas. To my horror, when I pulled off the masking tape, it pulled up quite a bit of the silver paint. Craig Reinbrecht came to my rescue and urged me to buy "low adhesive" masking tape. This solved one problem, but not the the bleeding problem. Because so many layers of the silver paint had been torn out by the tape, it was impossible just to respray on the silver paint. Naturally, I did spray on new paint, but it looked horrible because of the unequal layers.
In desperation, I sanded off all the silver paint and the primer below it so that I could start all over again. Once I had exposed the stainless steel surface below, I polished it up with some super fine steel wool in preparation for the primer. It then struck me: Why am I painting a stainless steel surface to look like stainless steel? I already have the surface I have been trying to created!
Delighted with my discovery, I attached all the necessary accessories. My programing panel was instantly completed.
I would like to point out that the beautiful little brass fuse holders that hold the rod that serves as an axle for the tape reel were a gift from acclaimed robot builder and respected B9 robot authority Michael Davis. Let me express my thanks to Michael again for his generosity. These little brass fuse holders are a tiny and highly inexpensive part if you can find them. Still, they are part of the small, nearly imperceptible details that contribute to the general quality of one's robot.
The rod that serves an axle for the tape reel is just a piece of 1/4 inch brass rod that I cut to size and whose ends I polished smooth. This was Craig Reinbrecht's idea.
I have added two extra toggle switches, which you can see in the upper left. The idea of added two extra switches was borrowed, yet again, from Craig Reinbrecht. In his robot, one of the switches serves to turn the neon on and off and hold it in that position. The second switch, if I remember correctly, turns all the brain lights on. The purpose of these innovations is to insure that all the lights are on when you take photographs of the robot. It makes for a much nicer photograph.
Of course, the face of the programming panel in the original robot costume was painted. By leaving the stainless steel surface unpainted, I have once again deviated from the original prop. My answer to this is "so what? Real metal looks more like real metal than anything painted to look like metal.
I have said it before, and I will say it again: My robot is not an exact replica of a television prop. My robot will be the real robot that the Lost in Space robot should have been.
And another thing: do not criticize me for including the little on and off plates for the toggle switches. I like them. They are staying! I would have used one for the upper switch, but there was no room because the switch is position too close to the light.
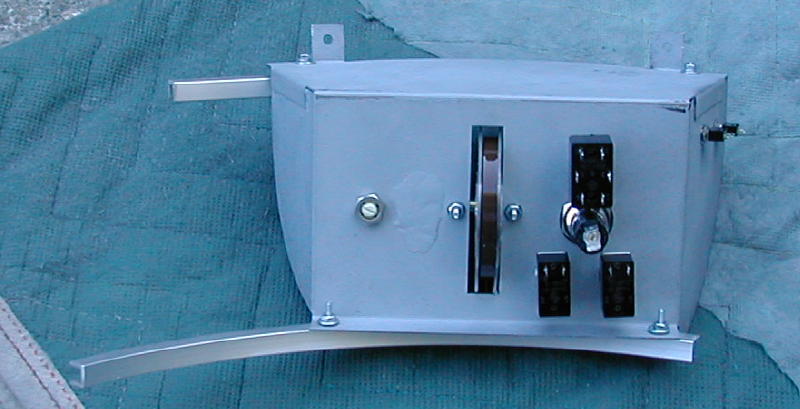
Here, you can see the back of the programming unit. Notice to the left
of the tape reel an uneven area. This is the residue from the plumbers
epoxy that I used to fill the extraneous hole between the tape reel and
the "round thing."
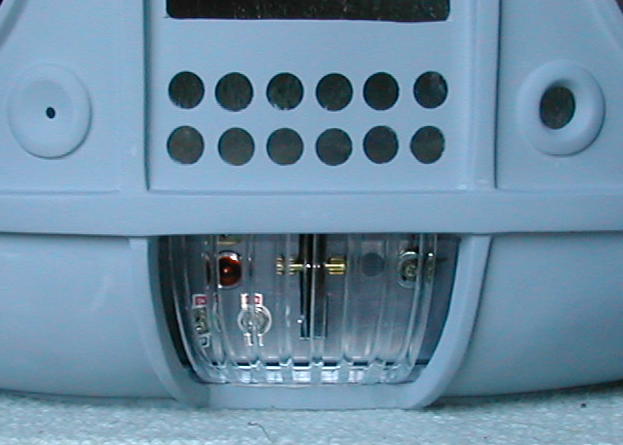
Here is the programming unit installed in the torso. My only remaining
task is to affix the little stickers.