| Home | Back to January 2003 Updates | To December 2002 Progress Page |
JANUARY 2003 PROGRESS
REPORT
Torso
This month, I have continued working on my robot's Dewey Howard torso. The relevant projects have been the following:
1. Creation of concave circular flanges for the torso microphone and torso knob.
To create the nice flanges that
my robot's torso did not have, I cut
out the flat disc with a hole saw and epoxied appropriately sized
washers
behind the disc.
Next, I used a wonderful
product, Propoxy 20 Epoxy Putty (B-1324), made
by the Lee Meyers Company of San Jose, California, to fill in the gap
and
create a smooth contour to the new flanges. The instructions on the
tube
were easy to follow. Using this product is just like working with clay.
After applying the putty, one smoothes it with moistened fingers. The
preliminary
results were impressive.
 |
 |
My next task is to smooth the
dried putty with sand paper to give the
flanges exactly the right shape.
I will be using this same product to create the little radar dish holders. I cannot recommend a product higher.
2. Insertion of jacks to hold the 1/8" mini plugs of the power pack.
I purchased Radio Shack
two-conductor 1/8" (3.5mm) mini phone jacks,
open-circuit type (Cat. No. 274-251C). Not knowing the best way to
proceed,
I send out a call for help to the B9 Exchange List. Expert robot
builder
Mike Joyce, the genius behind B9Creations
and B9Helpers.org,
came
to
my rescue and send me the following set of instructions, to which I
have
added appropriate photos from my progress.
1. Drill the torso holes just large enough that the jacks have a bit of "play" when inserted.I followed these instructions almost to the letter, although, obviously, the last part of step 6 and step 7 remains as a future project.2. Insert the power pack into the large torso holes and then from the inside snap the jacks onto the power pack plugs. This holds the jacks in place and ensures that there is perfect alignment.
3. Bondo or epoxy the jacks into place from the inside of the torso. Be careful not to cover any wire leads, etc. To make this easier I soldered my wires onto my jacks BEFORE I epoxied them in place.
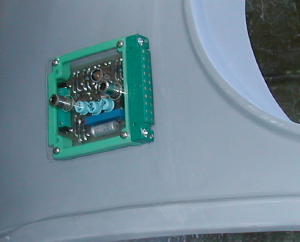
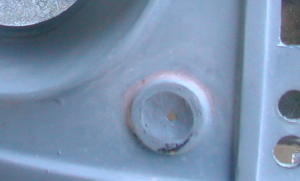
[note from FH: These are the jacks with the mini plugs from the power pack inserted from the outside. The black mess is the epoxy. I opted to solder the wires to the jacks later, when it is time to wire up the entire robot. I may regret this deviation from Mike's expert advice, but for now, I feel I did the right thing.]4. After the epoxy has cured, pull the power pack. On the outside of the torso you will see the three jacks sticking out a bit. Fill any gaps between the torso and the jacks with Bondo and let cure.
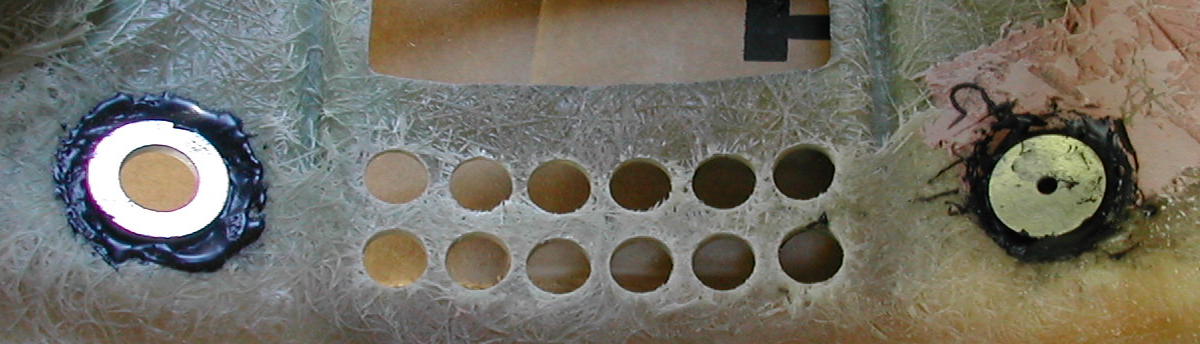
[note from FH: I have become a believer in liberally slathering Bondo body filler around. There is no value in being neat because Bondo body filler will shrink ever so slightly. After it has dried, you can easily sand away the excess. You will always find that the hole you wished to fill is entirely filled with the Bondo body filler. Those few times that I tried to be neat and have the Bondo body filler smeared only in the desired hole, a small deficit resulted, obliging me to make a second application of Bondo body filler.]5. Using a file, Dremel tool, sanding block, etc. Sand the jacks down until they are flush with the torso surface. This is not was hard as it sounds as my jacks were made of a fairly soft metal.
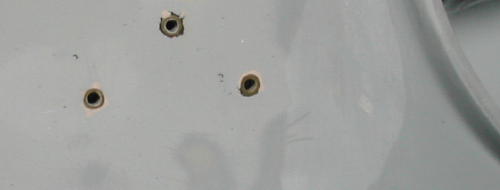
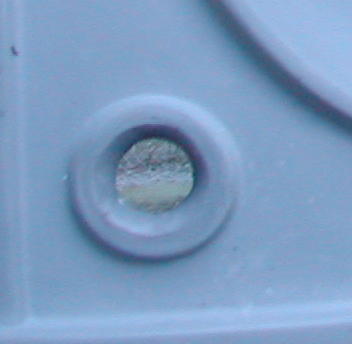
[note from FH: The black color around the jacks is epoxy. The pink is Bondo body filler. It is difficult to tell from the photograph, but the surface of the torso around the jacks is as smooth as glass. I took Mike at his word and found that the tiny collar of the metal jack that protruded beyond the torso was indeed very easy to sand down. I simply used 100 grit sand paper wrapped around a wooden block. After moving up to a finer sandpaper, I finished with wet 300 grit sandpaper. The results were very satisfying.]6. Check again for any gaps that need to be filled with Bondo. Fill the jack holes with clay or some other easily removable material.
7. Prime, texture and paint the torso as desired. Once finished, remove the clay and you're done!
Thank you very much, Mike Joyce!!! You are the living spirit of B9 Builder generosity and helpfulness.
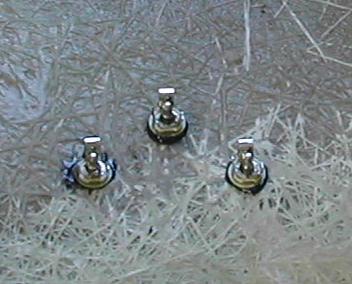
3. Creation of the four metal pegs for the wrist latches.
I fashioned my pegs out of
water-cured steel. With a hacksaw, I cut
four lengths of about 2 inches. The resulting rods are then inserted
into
a wooden block. The block helps secure the rods so that they will not
wobble
and risk damaging the torso.

This wooden block sits inside
the torso above and bellow each torso
bay.
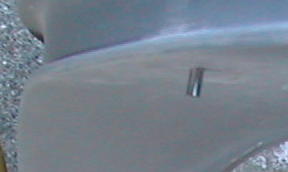
The peg is crooked because the wooden block into which it is embedded
has not had been glued in place. I must also sand the cut end of the
peg
so that it is smooth and slightly rounded. It would be distressing, to
say the very least, to have the pegs rip a hole in the rubber arms.
After the torso has been painted, I will epoxy the blocks in place. The reason that I have not yet epoxied them in place is that the cramped interior space above and bellow the arm bays does not allow the rods to be inserted into the blocks after the blocks are in place. My goal is to prevent the rods from being painted when the torso goes to the auto paint shop for professional painting. The wrist latch pegs of the original robot were unpainted metal. This alone is a good enough reason to leave them unpainted, but the more important reason is that, if they were painted, the paint would quickly chip off with use. The shiny naked metal peg will always look good because each pass of the wrist latch will polish the peg.
The rods are very tight in the
wooden block, so I may choose to avoid
epoxying the rods into the wooden block. This will enable me to adjust
the amount of peg that protrudes through the torso, should I feel it
necessary
to do so. I like choice, and I think it is wise to build into the robot
some adjustable features. After all, there is more than one type of
robot
wrist available. I am happy with the solid resin wrists that I have
right
now, but in the future, someone might come up with a superior, more
accurate
wrist with a different diameter. I want to be able to choose new wrists
in the future. Having pegs of adjustable length will give me this
freedom.
In any event, they can always be epoxied into the blocks later.